Planning and implementation complete, let us move to the kitchen finale.
We shall start our tour in the main ‘work-zone’. We replaced the induction hob (very modern, but can’t beat gas) with this nice 5 burner. Plenty of room for tea-pots with hand-made cornish-blue inspired tea-cosies. Behind it you can see the subway tiles and grey grout. Very fashionable. The cupboards are split in the middle by the hood, on one side housing all the crockery and the other, all food stuffs. These extra tall cupboards have 4 shelves, but if your a shortie like me that does pose a slight problem for access.


Enter the stool. My dad made this many years ago, and my mum painted it for our bedroom as children. I spied it at Tullyroan at Christmas in a shed and its now doing a great job in the new kitchen, giving just the right amount of extra height for top-shelf-reaching. Stretching for an item does usually result in it, and me, toppling over, hardly ideal for children but sentiment is worth more to me evidently.

I aim to keep a fairly clear worktop (not sure i have quite achieved it yet!) so have tried to keep the appliances to a minimum. As you can see there is a red theme going on. I got the Kitchenaid for my 30th birthday, and the Magimix was a wedding gift, I mention them both because despite the cost, i would say these are two frequently used and highly worthwhile appliances if you are in any way cooking- or baking-inclined.
The knobs are a mixture of oak, and brass cup handles, sourced on ebay. I wasn’t sure about mixing them up but it seems to work ok. We had a little extra space in the corner here so the joiner made the wine rack to fit.

To maximise storage, we looked into the possibility of plinth drawers under the units, but then realised that abandoning kick-boards and using baskets was much cheaper and more pleasing to the eye. The free-standing look keeps the whole style a bit more informal. We were pleased to find these lovely golden, if slightly woodwormed, pine boards under the old lino, which we had sanded, sealed and finished in a durable matt varnish.

Moving over to the washing-up zone. We sacrificed a full-size dishwasher to be able to fit this delightful double ceramic sink. Underneath is a very indulgent drawer with lots of bins for recycling and waste. But i guess it all has to go somewhere!? We were able to use the extra space underneath for a cubby hole for my plethora of trays, and one of those retracting towel rails that i’ve always fancied. All the sink paraphernalia is tucked away in the white buckets, for some reason i am intolerant of cloths and sponges etc lying around so this pleases me greatly.


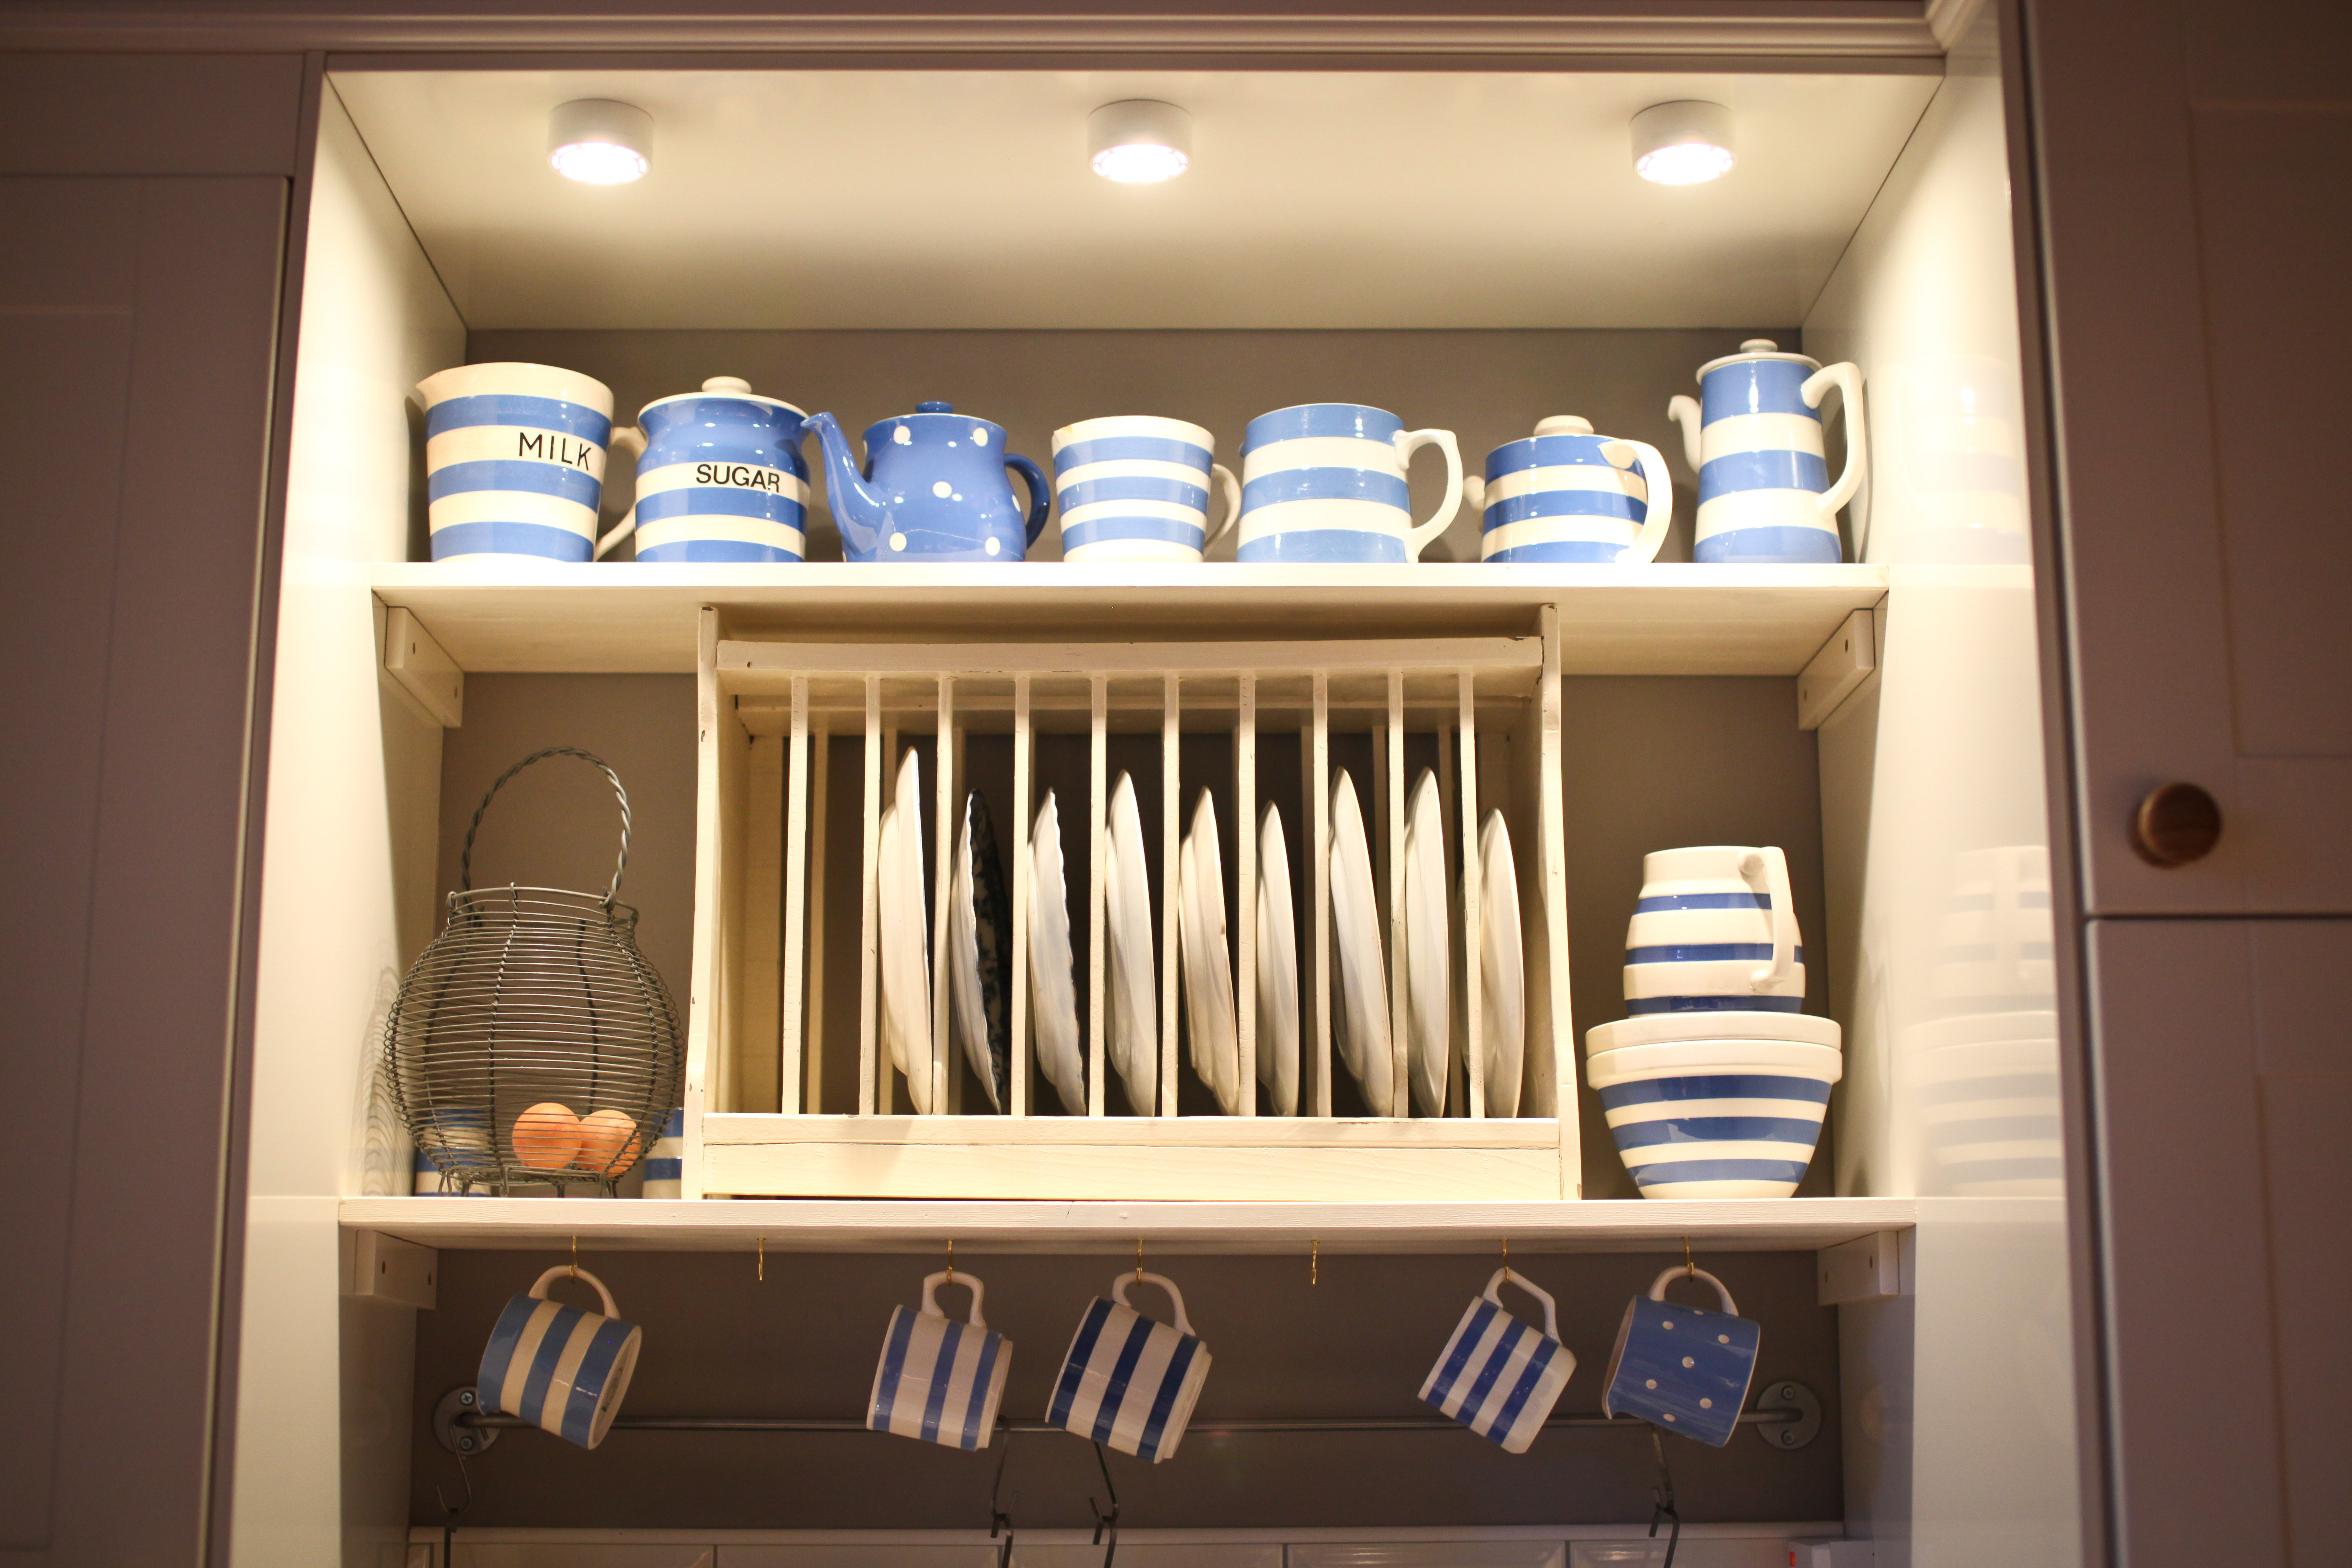
The shelving above the sink is a personal favourite. This is the dish-rack i mentioned earlier, purchased in a charity shop, which is sandwiched between painted pine shelves. I then went all-out on the english theme here, with my Cornish Blue collection, and Queen Elizabeth coronation mugs, displayed on hooks to give the area a ‘dresser’ feel.


We had hoped to fit in a small seating area by the window, but when it came to putting all our stuff in, i realised we really would value as much ‘bench’ space and storage as possible. This oak unit was originally a shop fitting and is handmade. It fits perfectly under the window, and is a nice sturdy place for cookbooks. The Roman blinds were originally hangings i found in a charity shop, i then converted them into blinds although strictly speaking they are a bit narrow and possibly not quite horizontal either!


Behind the door, where the radiator is situated, i had these rails put in for pots and pans. This saves loads of cupboard space and utilises an area that is essentially a waste of space, plus leaving them readily accessible for grabbing mid-recipe. We had considered a central hanging unit for pans etc but with such a high celling it wasn’t really practicable.

Last but not least, the shelving. The brackets are from Ikea but painted white, and the timber is pine which i then stained oak-coloured using a brushing wax. Not a substance i am familiar with but highly reminiscent of the few times i have applied fake tan, the stuff that you lather on all messy and then wash off for a nice smooth finish. The theme here seems to be storage tins and more red again. I LOVE vintage tins, the more kitsch the better. I’ve mixed them up with modern vintage in the form of 5 Orla Keily cake tins and my most recent addition, a sugar bowl given to me this Christmas. Possibly my most favourite collection is the green french enamelled tins, all the way from the flea markets near Paris. They were a gift for doing some wedding pictures, the couple drove to france and filled the car from the markets for their honeymoon. How dreamy and romantic!


 The total cost of all materials and workmanship came to a grand total of £6700. We also flogged the old appliances for another £400 so that knocks a bit more off the price. I know its not polite to talk about money but i have done so to highlight that it is possible to do a decent kitchen on a budget. The secret i think is mixing cheaper base products with extra details from elsewhere, avoiding an Ikea-mania visual outcome.
In summary, a little country in the city. A place for everything, and everything in its place!
wowsers! great job guys.. even think i’d quite enjoy doing dishes in that nook, which is good, cause I probably owe you a few chores! amazing attention to detail as always sis! cant wait to come visit x
Love it! Particularly the way you’ve done the open shelving. Loving all the nick nacks (but of course I would).
I love it 😀 I hope to do my kitchen up eventually and this is just the kind of thing id like <3